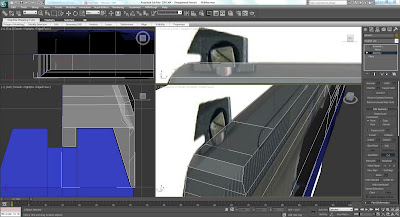
I selected edges and then used shift + move selection to make the rough gun shape. I then added vertices and moved them to match the outline of the gun and its features. I was then able to select the outside edge and press loop, and used shift + move selection to make the gun into a 3d object.

Using the symmetry modifier allowed me to make the gun equal on both sides and meant that I only had to model one side of the gun.

To make the indent in the handle I firstly deleted the inner polygons and then selected the outside edges. I then held down shift, and using the select and move tool moved the edges inwards. I was then left with an opening that I filled in using the create tool. I clicked on four different vertices and with the create button pressed down and then right clicked with the mouse to create the polygon.

To create some of the details on the gun, like the switch above the trigger, I selected the edges and used the scale tool. I then moved them with the selection tool and applied a chamfer, which allowed me to create a smooth edge by applying more segments.

To make the top slider I followed a similar method to the main body of the gun. I created a 2d plane and then added vertices and cut to add lines where necessary, constantly looking at each view port and looking at reference photographs to get the scale of the gun correct in all directions.

I had to make some modification to the base of the gun and the top slider to make them fit together.
The rear and front sight were constructed using the cut tool to create an opening which I could then copy using shift + select.


To make the barrel I created a tube and then converted it into an editable poly. I selected every 5th internal edge and moved it fractionally into the centre. I then selected the entire internal front vertices and rotated them around 30 degrees. I then did the same for the vertices at the other end of the tube, but in to opposite direction; this created the rifling.
Perspective view of the rifling.

No comments:
Post a Comment