To make the ammunition for the gun I searched for a sectional drawing of a 9mm bullet. I then drew around half of the bullet with the pen tool.

This is the drawing of the bullet. I looked at a photograph of a bullet that had been sliced in half so that I could see how far the bullet was inserted into the shell.
I saved the drawing and then exported it as an Illustrator path so that I could import it into 3ds max.


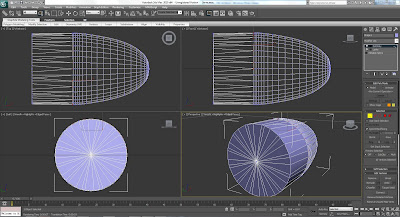
I moved the pivot point to the centre of the bullet and used the lathe modifier to revolve it around the x-axis.

As I intend to show a close-up of the bullet travelling in slow motion I decided to increase the number of segments, which will give the object a smoother finish (this will increase the time it takes to render the animation, though).

To create the rifling of the bullet I selected two vertices and left a space of one vertex all the way round the diameter of the bullet and rotated them five degrees anticlockwise.
I then repeated this on the next ring of vertices, but in the opposite direction. This gave a slight twist to the edges running around the diameter of the base of the bullet.
To finish the rifling off I selected each vertex that I didn't rotate from the back of the bullet and pulled them each down. This gave the outer surface of the bullet a twisted indent.
I repeated the process I did for the bullet in Photoshop to trace around the shell and imported it into 3ds Max in the same way.
I moved the axis to the centre and used lathe to rotate the Illustrator path.
I increased the number of segments to get a smoother finish.
I set the renderer to mental ray and applied architect and design materials. I used a copper material for the shell, which I decreased in glossiness and used chrome for the bullet and reduced the glossiness.


No comments:
Post a Comment