I found that it was the little details that seemed to take a long time setting up, for example the lighting and selecting materials to use the scenes. I found that whatever I tried to do in 3ds max took much longer than I anticipated. In future I will try and set myself more realistic goals and work harder to manage my time. I think I underestimated the time required to render and edit the the final production. I have learned a lot of useful modeling and animation techniques in this module and have enjoyed working to the brief.
Thursday 14 April 2011
Evaluation
I am quite pleased with the end result. I have followed the brief and produced a thirty second trailer for Casino Royale. I feel that I could have produced a better piece if I had had longer on the project. I had to make the decision to not include the scene when the Aston Martin crashed as I needed to experiment more with reactor to get the required effect. I found producing the bar scene animation a lot more enjoyable than the car scene and found using reactor very interesting. I enjoyed the modeling side of the assignment much more than the animation and felt that picked it up quite quickly.
I found that it was the little details that seemed to take a long time setting up, for example the lighting and selecting materials to use the scenes. I found that whatever I tried to do in 3ds max took much longer than I anticipated. In future I will try and set myself more realistic goals and work harder to manage my time. I think I underestimated the time required to render and edit the the final production. I have learned a lot of useful modeling and animation techniques in this module and have enjoyed working to the brief.
I found that it was the little details that seemed to take a long time setting up, for example the lighting and selecting materials to use the scenes. I found that whatever I tried to do in 3ds max took much longer than I anticipated. In future I will try and set myself more realistic goals and work harder to manage my time. I think I underestimated the time required to render and edit the the final production. I have learned a lot of useful modeling and animation techniques in this module and have enjoyed working to the brief.
Rendering and Premier Pro
The final render settings I used for the road scenes cameras were quite low as each frame was taking a long time to render. I used HDTV (video) at a resolution of 1280 x 720 and set everything to low on the render frame window. As it was a very dark scene this wasn't too much of an issue.

In premier pro I edited all of the individual scenes from each camera. I then recorded sounds from the film directly through my sound card from the DVD and converted them to uncompressed wav format so they were compatible with Premier. As the initial scene with the gun firing was in slow motion I needed to slow down the sound of the gun. I did this in premier by right clicking on the sound clip and selecting speed and duration. I set the speed to ten percent and ticked maintain Audio Pitch.
The theme tune was place on the time line and played through the whole trailer. I used an Exponential Fade to gradually fade the tune out at the end

After the editing I exported the trailer to flv format. This compresses the video and audio clips into one file ready for viewing.
Lighting and camera
To make the front headlight beams I use two spot lights and adjusted the hot spot / beam to 20 and the fall off field to 25. The shadows were turned on and a volume light was added in the advanced effects panel. This created the visible beam. The actual lens covers of the lights were just self illuminating colours.
The lights were linked to the car with the select and link button. This kept the beam fixed to the car as it travelled along the path constraint.

I had lots of problems with exposure when using the day light system in this scene so to overcome this I placed an omni light at the top of the scene and linked one to the car for extra illumination.

To be able to see the wheels on the car rotate I attached a camera to the side of the car filming it from a side view.

Saturday 9 April 2011
Making the road and mountain scene.
To make the road for the car scene I drew a plane, converted it to an editable polygon and then using the shift and move dragged edges outwards to make up the basic shape of the road. To make the road flow downhill polygons were pulled down on the z axis. A Turbo smooth modified was then added to give the road a softer surface.

The next step was to make a path that the car could follow. It was important to select the smooth option so the car could follow in a natural way. The lines vertices were individually moved to match the curves of the road.
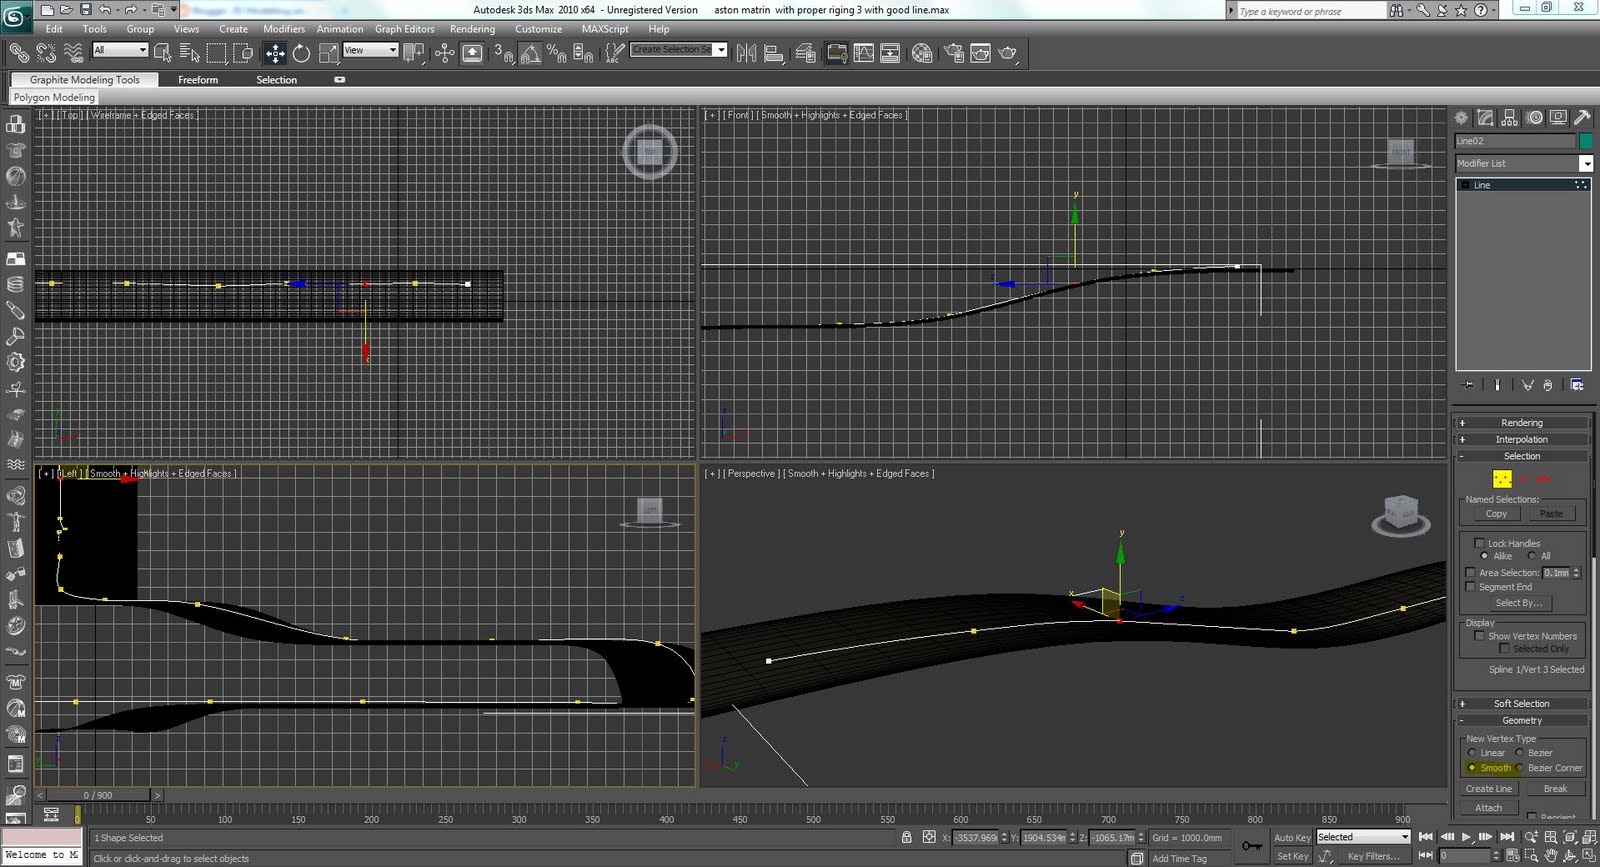
To make the mountains the road was cloned and then the edges were repeatedly cloned along the Y axis and gradually moved up the Z axis. A turbo smooth modifier was then used to make a more detailed slope.

The rigged car was imported into the scene and then the main body controller was selected. The path constrain was chosen under the animation tab. The constraint was set to the line and the follow and filp were selected under the path parameters tab. this made the car follow the path.

I set up two cameras for this scene. The first is linked to the car, positioned on the front windscreen, so that I can create an in car view of what the driver would see. The second is stationery after the first bend

This is a test render of the in car camera.
This is a test of the outside camera after the first bend.
There will need to be two more cameras added to the scene. One will be a distance shot and the other will be looking from Vespers eyes as the car travels towards her.
Setting up the rigging for the car.
Setting up the rigging for the car allows you to have easier control over the car when making the animation, by linking the parts in a way that they work together. This is the tutorial I followed to achieve the rig. http://www.youtube.com/watch?v=gnzsrJGezsc&feature=related
The image below shows all the rigged features that controll the steering, drifting, wheel rotation, and suspension.


The first step was to attach all of the parts of the car to the main body and the wheels tires to the alloys using the attach function. Then on a new layer I created point helpers that would control the front steering and wheel rotation.The helpers were aligned to the central pivot of the wheel and then the select and link tool was used to link the helper to the wheel.

In the hierarchy for the smaller box helper the scale was locked and the rotate was locked on the X and Y axis so that the steering could only move left and right. The same process was carried out on the larger pivot helper but with the Y axis being the only free pivot to rotate. This was repeated for all 4 wheels.
(it is important to name each helper with regar to which wheel it is for)

To operate the steering more easily a circle spline was created and aligned to the centre axis of the front wheels. Using select and link the helpers were attached to the circle spline this meant that when the circle spline was rotated the wheels followed. Using this technique I made the drift control, steering and suspension.
Every controller was linked to the main body controller (so that moving the main body moved the whole car and its controllers).

To make the suspension work a controller was made above the car out of three circle splines. This was then linked to the body and its wire parameter were adjusted. allowing for the rotation over the desired axis. To adjust the amount that the car rotates. *.08 was added to the expression.

Using the same method the wheel rotate pivot helper was linked to the main car control. Its rotation was adjusted under the wire parameters to "DegToRad" this turns the wheel according to its size and radius.
Thursday 7 April 2011
First scene animation
This is the first scene that will play at the same time as the car crashing. I have edited the avi's in adobe premier pro. When I have finished the car scene the two will play at the same time, but alternate between each scene
.
Using reactor to break the cocktail glass.
I saved a copy of the bar and gun scene to as I had to alter parts of the scene.


To break up the cocktail glass I downloaded the Rayfire plugin demo. This made it possible to use the ray fire modifier. I selected the object (cocktail glass) and selected the Rayfire modifier. I selected the radial pattern and move the pattern central to the bullet. I set the radius to 3.6 and the rings and rays to 10. I unselected cap holes and clicked fragment. Once I was happy with the results I pressed detach, which breaks the glass in to individual objects.

The next step was to use the reactor modifier. I created a rigid body collection. This is done by selecting the icon that looks like 3 boxes. This was then placed into the scene and all of the objects that related to the glass breaking were added (the table, bullet and all the pieces of the cocktail glass).
I deleted all of the key frames in the time line and reduced its size. I then animated the bullet travelling through the glass again.

The next step was to adjust the settings in the property editor for each part in the RBC. The bullet's mass was set to 100. The simulation geometry was set to mesh concave hull and the object was set to unyielding. The fragments of glass had a mass of 5 and the geometry was set to bounding sphere. The table top was set to inactive.

I pressed the preview animation button and then experimented with different collision tolerances, gravity and world scale until the glass broke at the right speed. The final figures I used were 0.62 for the collision tolerance, -200 for gravity and world scale of 20.

Animating the bar scene
The first Thing I had to do for the bar scene was to import the gun, bullet and shell into my bar scene (I clicked on import and then merge).
I positioned the gun at one end of the room, in line with the cocktail glass on the table.

I then set about setting up the time line. I wanted to have 30 frames per second, and wanted the scene to last 30 seconds, as i wanted to give the effect of the gun firing in slow motion. This meant that I needed 900 frames in the time line.

After positioning the bullet and the shell inside the gun I selected the bullet and pressed the auto key button. I then moved the time line to the 900th frame and dragged the bullet to the end of the scene, just past the cocktail glass. This created the movement of the bullet. While the bullet was still selected I used the track view of the curve editor change the tangents to liner. This made the bullet travel at a constant speed. I used auto key to put a spin on the pellet, with the rotate button.

I used the same technique to animate the trigger; I had to change the hierarchy of the pivot point to make the trigger pivot in the right place. I selected the top slider of the gun and used auto key again to create the sliding back motion of when a gun is fired. By selecting the item that I had animated and then sliding its key frames along the time line I could alter the timing of each animation.

To make the shell eject out of the gun I used key frame and the move tool. I also rotated the shell to give the impression that it was fired out, again I purposefully made this slow as the shot was meant to look like it was in slow motion.

To make the smoke that fired out of the gun barrel and shell I used the super spray particle system. This creates a stream of objects that you can modify. I selected a particle size of 5.3, a speed of 1.122 and a changed the timing so the particles started on the 50th frame and finished on the 200th.

I applied a particle material to the system, to make a smoke like colour. I set the glossiness to zero and applied an opacity map to the material to alter its transparency.

After the animating had been done, I set up ten different cameras. I positioned each camera so that it could film a specific shot of the bullet travelling through the air. I then labelled each camera with regard to what frames I wanted it to capture. This meant that when it came to rendering the shots I only render the specific frames I needed, saving time.
One of the cameras I positioned facing the barrel, so that I could capture the bullet flying towards the screen. I rendered each set of frames for each camera at 720 *1280 on low settings. I rendered the last two scenes with the close up of the glass breaking at higher settings to get more detail.

Tuesday 29 March 2011
Using reactor
The first step was to create a rigid body collection (press the button that looks like 3 cubes to the left of the screen). By clicking the add button in the right hand modifier list you can add all the objects to the collection, make sure you don't add the rigid body itself to the scene.

Under the ridged body properties tab the individual properties of objects can be set. All the objects in the scene have to be set to convex hull.

The collision tolerance was set to 0.62 this is determines at what distance the collision takes place. The gravity was set to -350 which created a relatively realistic simulation of real world gravity.

The next stage was to add some momentum to the bowling ball by selecting auto key and then scrolling to frame five and moving the ball slightly towards the pins. Reactor could then use this movement to work out how much momentum the ball has.

By putting some back spin on the ball, using the rotate selection and moving at the ball slightly to the right along the y axis it was possible to create a more realistic bowel to the ball.

To preview the animation at any point you can select the preview animation button on the right under the havok world tab. To make the animation into renderable frames you have to select the create animation button. This is an irreversable step so I saved the created animation as a new file.

I then added materials and rendered the animation as an avi and in 720 HD format.
Tuesday 22 March 2011
Using Morpher
I started off with a simple head model which I had converted into an editable polygon.

I cloned the model four times so that I could make the four different expressions for the models. I kept the original model to one side, to use later with the "Morpher" modifier. I selected individual polygons on each face and moved them to change the expressions on the faces. I named each face with regard to what the expression I had made was.

I applied the turbo smooth modifier to the original face and then the "Morpher" modifier.

With the "Morpher" modifier open you can right click on the box that says empty under the channel list and add your different faces, you can change the amount from 0 -100 and the original face will be affected by the adjustment.

To animate the face I selected the auto key button and scrolled down on the channel list amount, this set a key frame. I moved the timeline and altered the range or each channel list to produce my animation.

Tuesday 15 March 2011
Using bones
I started with a simple model of a torso which I converted into an editable poly. I selected the bone feature on the system tab and began adding bones to the torso starting from the shoulder joints. Making sure that the joints for each bone is in the correct place. I made sure that there was a slight bend in each joint in the direction that it can move.

The next step was to go to the modifier for each bone and add fins to each side increasing the size of them so that they were just proud of the body.

This was repeated for all of the bones and they were adjusted to best fit the arm.

The entire process was repeated for the opposite side of the body.

The next stage was to use the IK limb solver to make a realistic pivots of each joint. I selected the last bone at the end of the hand and then selected the Animation > IK Solver > IK limb solver and selected the last bone of the base of the shoulder.
I then added a bone for the body. (It is important to name each bone to make it easier to identifi them).

I added fins to the body bone the same way as shown above. I selected the torso and in the modifier tab selected skin. Under the "add" tab I entered all of the bones. This connected the bones to the skin, meaning that when I moved a bone the skin moved with it.

Although the bones and body were joined some of the joints didn't move naturally with the skin. To overcome this problem the skin envelope had to be adjusted. By selecting the envelope tab, under the skin in the modifier tab each bones surrounding mesh can be adjusted and is displayed in a colour spectrum.

I made this simple animation to show the joints working correctly
Tuesday 8 March 2011
Using path constraints
I drew a path using the line tool and then a box to follow the path.

Whilst the box was selected I clicked on Animation > Constraints > Path Constraints and then selected the line as the path. This makes the object move along the path. To make the object follow it in a forward direction the follow box has to be selected in the modifier tab. The bank box can be selected to make the object bank around the corners of the path.
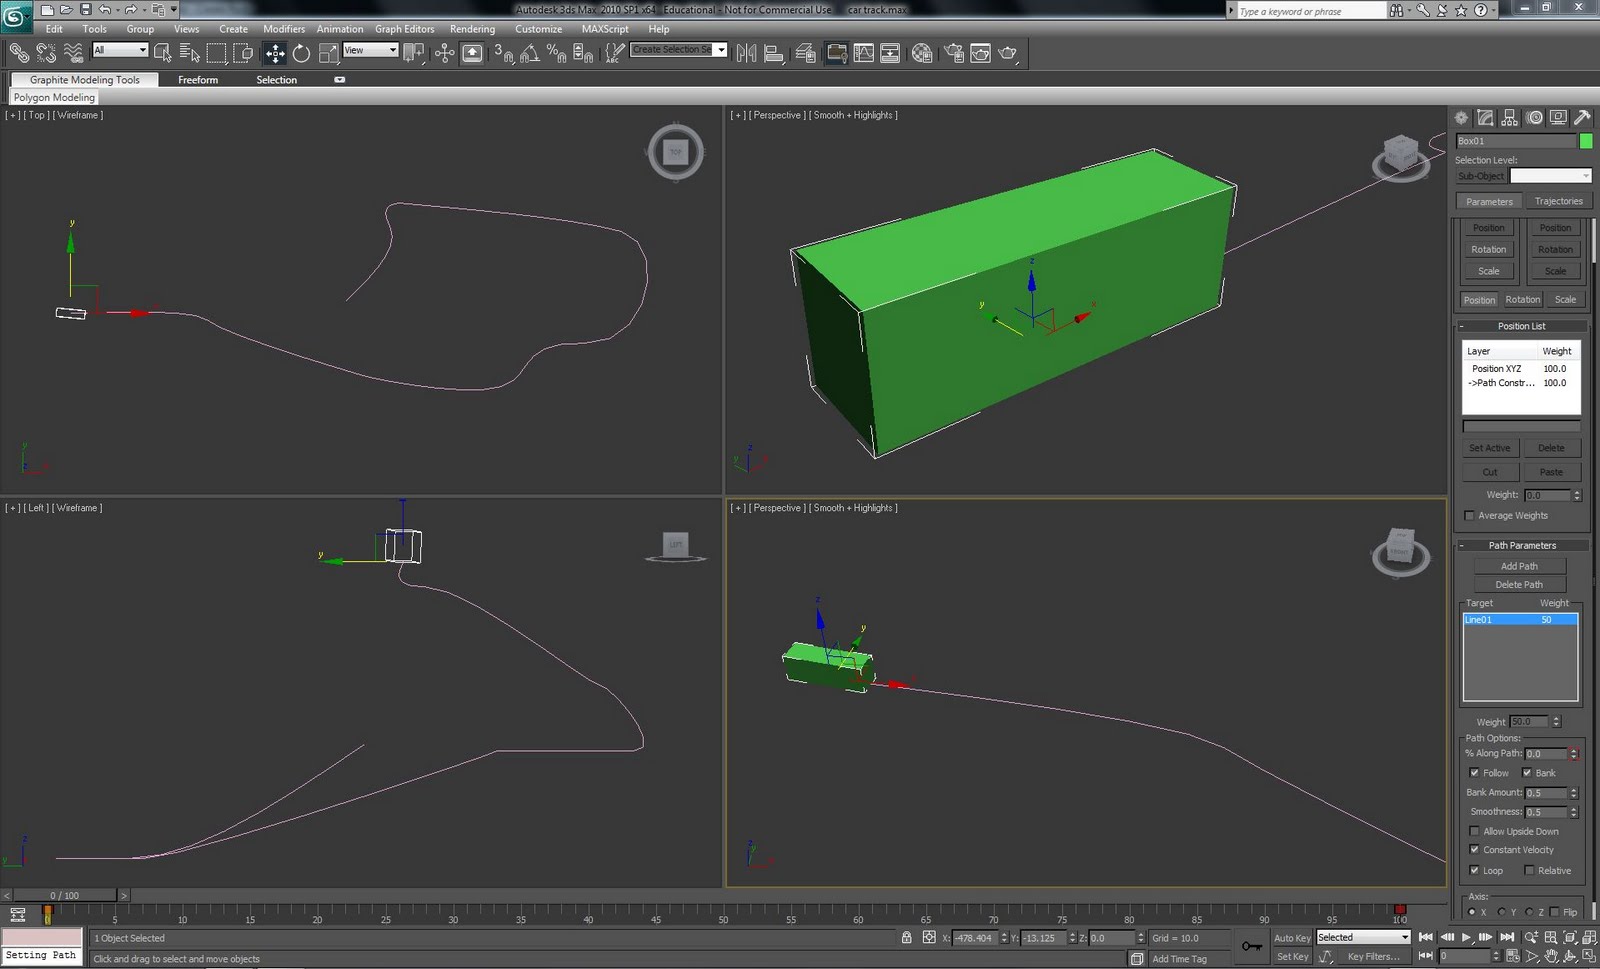
This is a simple render of the box following the path. I will experiment with this technique to animate the Aston Martin along the road.
First Animation
To create the feeling that the sphere was bouncing I made a sphere and pressed the auto key button. I then scrolled along the time line to the 20th frame and moved the sphere up.
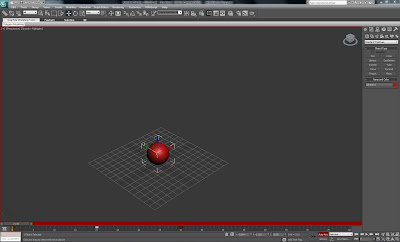


The auto key button fils in the pervious frames to make an animation of the ball getting from its start point at frame one to frame 20.
I then selected the 40th frame and moved the sphere back to its original position.

I deselected the auto key button and pressed the play button. The animation did not look very realistic, because the ball would slow down as it reached the top and quickly fall back down.
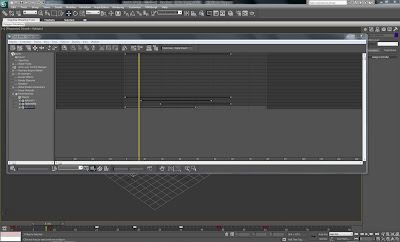
I opened track view curve editor which allows you to adjust the motion of the object using a graph.

I set tangents to fast at the beginning and end of the animation and adjusted the shape of the top curve to make it flatten out, to create the slowing down of the ball as it reaches its maxim hight.


To repeat the action of the ball as if it were bouncing I selected Param Curve Out-of-Range Types and selected the loop graph.

To make three different balls bounce at different times I cloned the original animated sphere two more times and changed their colours. Using the Track View Dope Sheet I moved the bars that represent the different objects (sphere 1,2 & 3) so that the animations were staggered.

This is a render of the finished scene
Subscribe to:
Posts (Atom)