Monday 28 February 2011

Finished bar scene

In the bar scene, the bullet is going to be travelling through the air in slow motion. The camera is going to follow it across the room.


The camera will zoom in and show a close-up of the bullet travelling in slow motion.


When the bullet hits the cocktail glass, the glass will break and the drink will spray everywhere.


I want to use the depth of field settings to make the background blurred when shooting the close-up.


Bar scene

For my bar scene I needed to make some bottles of drinks and tumblers. I made these first as they would be the most time consuming. Below is a cross-sectional drawing of a cocktail glass I created with the pen tool in Photoshop. I repeated this process for the tumbler, cocktail shaker and drinks bottles.


This pen drawing was imported into 3ds as an Illustrator path, and then the lathe modifier was applied. I increased the number of segments to get a smoother finish.


I applied a solid glass material from the architect and design library, using the mental ray renderer.


These are to other Items that I made in exactly the same way.


To make the bar scene I created three walls using the box tool from the standard primitive tab. I used a plane for the flooring and a large cylinder with two top segments for the bar itself. I converted the cylinder into an editable poly and removed the back polygons.

The table is constructed from a cylinder with a chamfer around its top edge and a thinner cylinder with a taper modifier for the central leg.


I moved the scene bar about to make it fit in the corner and added a base to the table, which is constructed out of another cylinder with a taper modifier applied to it. I added three spotlights over the bar and two omni lights to light the rest of the room. I adjusted the intensity to get the desired effect.


To make the back shelf behind the bar I created a box with six width segments and three height segments and moved the edges about so that I could delete the inner polygons which make up the opening. I then selected all of the edges that I had deleted and holding shift, and using the section tool, created new edges which formed the inside of the shelf. I then capped these ends off to make the back face. I simply used clone instance to make the second shelf.


I positioned the glasses and bottles around the bar using clone and set the number of copies that I wanted.


I applied different materials and adjusted them until the scene looked right.

Render of bullet

This is a render of the finished bullet.


As the base of the bullet will not be seen until it leaves the breach of the barrel, I have put the rifling on now, rather than putting it on later to save time.


Slow motion bullet

To make the ammunition for the gun I searched for a sectional drawing of a 9mm bullet. I then drew around half of the bullet with the pen tool.


This is the drawing of the bullet. I looked at a photograph of a bullet that had been sliced in half so that I could see how far the bullet was inserted into the shell.


I saved the drawing and then exported it as an Illustrator path so that I could import it into 3ds max.


I moved the pivot point to the centre of the bullet and used the lathe modifier to revolve it around the x-axis.


As I intend to show a close-up of the bullet travelling in slow motion I decided to increase the number of segments, which will give the object a smoother finish (this will increase the time it takes to render the animation, though).


To create the rifling of the bullet I selected two vertices and left a space of one vertex all the way round the diameter of the bullet and rotated them five degrees anticlockwise.


I then repeated this on the next ring of vertices, but in the opposite direction. This gave a slight twist to the edges running around the diameter of the base of the bullet.


To finish the rifling off I selected each vertex that I didn't rotate from the back of the bullet and pulled them each down. This gave the outer surface of the bullet a twisted indent.

I repeated the process I did for the bullet in Photoshop to trace around the shell and imported it into 3ds Max in the same way.


I moved the axis to the centre and used lathe to rotate the Illustrator path.


I increased the number of segments to get a smoother finish.


I set the renderer to mental ray and applied architect and design materials. I used a copper material for the shell, which I decreased in glossiness and used chrome for the bullet and reduced the glossiness.


Story board changes

I have decided to change a few parts on my story board. I want to cut between the scene of Bond crashing the car and the bullet firing in slow motion and eventually hitting a cocktail glass containing a Vesper Martini. I want to animate the glass smashing and drink spilling in slow motion. I want the trailer to open and close with Bond's voice saying the famous lines "The names Bond...........James Bond."


Sunday 27 February 2011

Walther p99 finished

I have used the mental ray renderer and used materials from the architecture and design folder. I have tried to make the gun have a matt black finish and the silencer a slight shine, by adjusting the reflectivity and glossiness.


I inserted an omni light into the scene, just above the gun, to get more realistic lighting in the scene.


By adjusting the aperture of the camera to F 2.0 and setting the target distance to the bullet I have created depth of field in the shot. I intend to do this for the animation to draw the viewer attention to parts of the trailer.

Walther p99 nearly done

Looking at the wire frame you can see how all the parts are positioned internally.


The silencer is constructed out of a tube which I have converted into an editable poly. I have cut the face that screws into to the barrel away and used shift and select to copy the outer edge and scaled it down to make a conical shape. I then repeated this to connect the silencer to the barrel.


I used boolean to cut a hole through the part that holds the barrel. I made the cylinder the same size as the outer face of the barrel and positioned it running though. I clicked on start picking and chose the cylinder that I wanted to remove. This created a hole running all the way through so that I could place the barrel inside.


I have used the chamfer tool to add fillets to some of the sharp edges to make the gun look more realistic.


Walther p99

I applied a picture of the gun as a background to a plane in the same way that I did for the Aston Martin setup and froze it in its position. I created a box and tried to make it roughly the same size as the top of the gun. After converting it into an editable poly, I removed all the back and side edges so that it was a 2d object.


I selected edges and then used shift + move selection to make the rough gun shape. I then added vertices and moved them to match the outline of the gun and its features. I was then able to select the outside edge and press loop, and used shift + move selection to make the gun into a 3d object.


Using the symmetry modifier allowed me to make the gun equal on both sides and meant that I only had to model one side of the gun.


To make the indent in the handle I firstly deleted the inner polygons and then selected the outside edges. I then held down shift, and using the select and move tool moved the edges inwards. I was then left with an opening that I filled in using the create tool. I clicked on four different vertices and with the create button pressed down and then right clicked with the mouse to create the polygon.


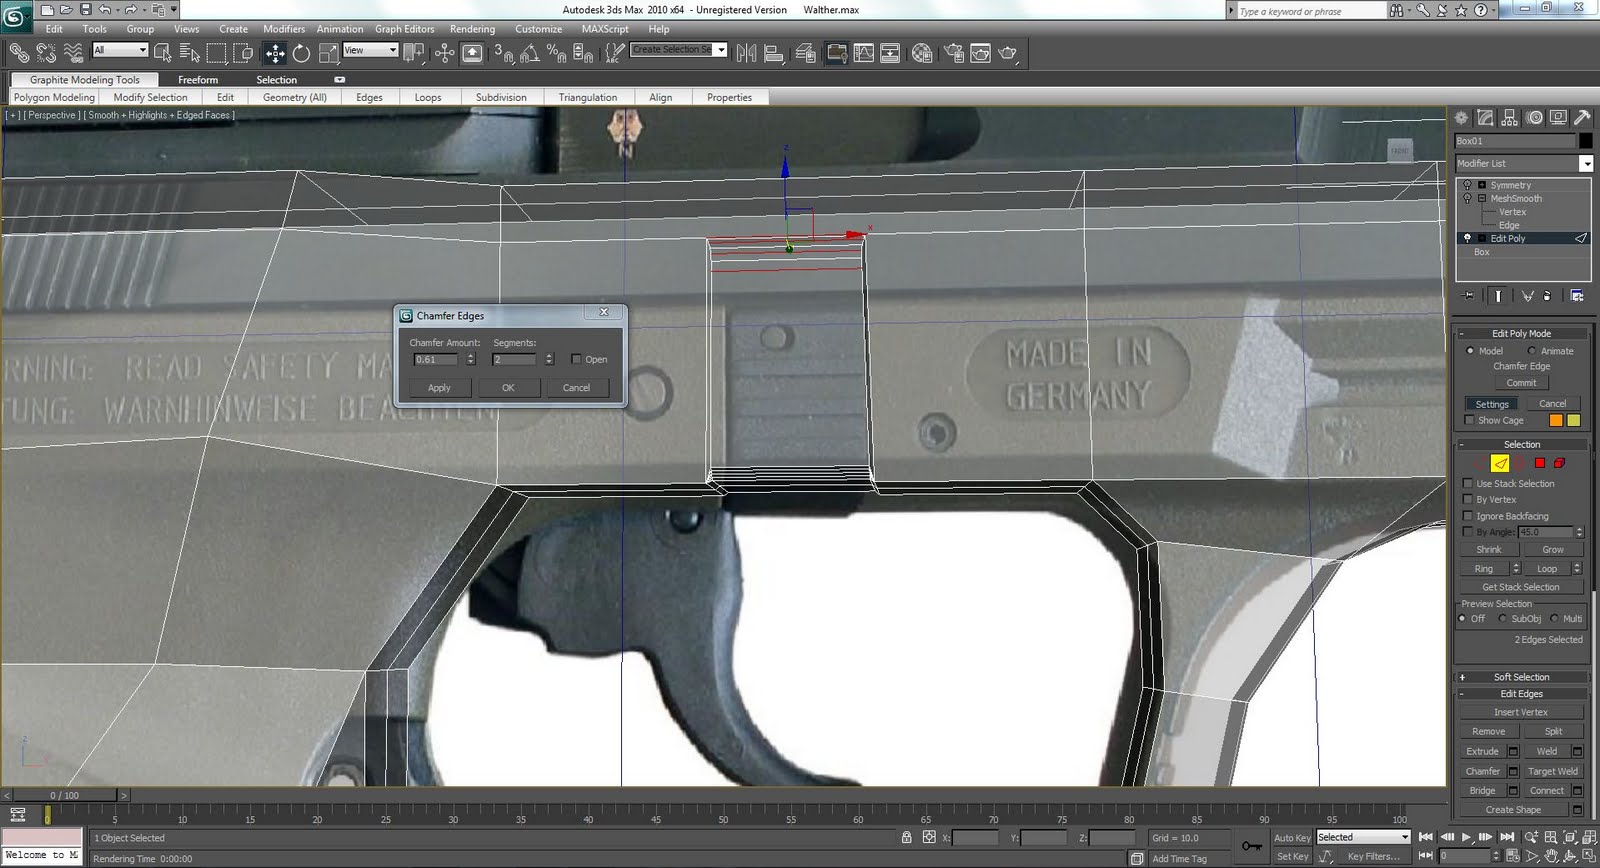
To create some of the details on the gun, like the switch above the trigger, I selected the edges and used the scale tool. I then moved them with the selection tool and applied a chamfer, which allowed me to create a smooth edge by applying more segments.


To make the top slider I followed a similar method to the main body of the gun. I created a 2d plane and then added vertices and cut to add lines where necessary, constantly looking at each view port and looking at reference photographs to get the scale of the gun correct in all directions.


I had to make some modification to the base of the gun and the top slider to make them fit together.

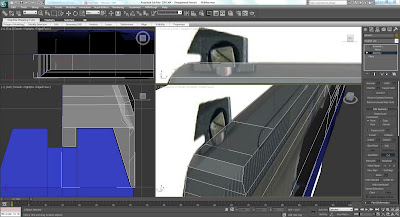
The rear and front sight were constructed using the cut tool to create an opening which I could then copy using shift + select.


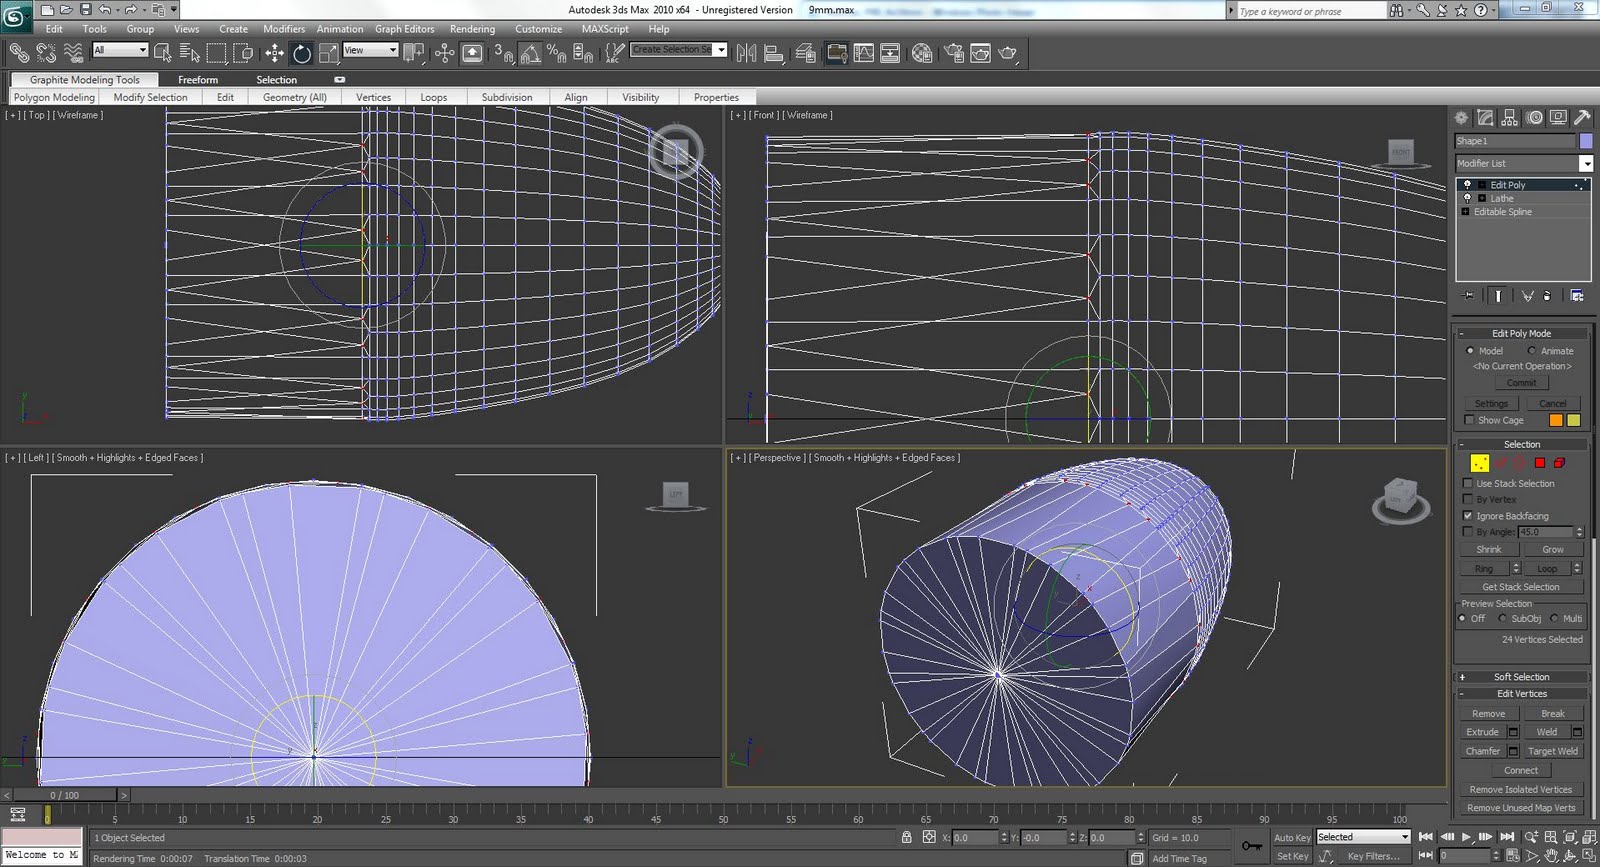
To make the barrel I created a tube and then converted it into an editable poly. I selected every 5th internal edge and moved it fractionally into the centre. I then selected the entire internal front vertices and rotated them around 30 degrees. I then did the same for the vertices at the other end of the tube, but in to opposite direction; this created the rifling.


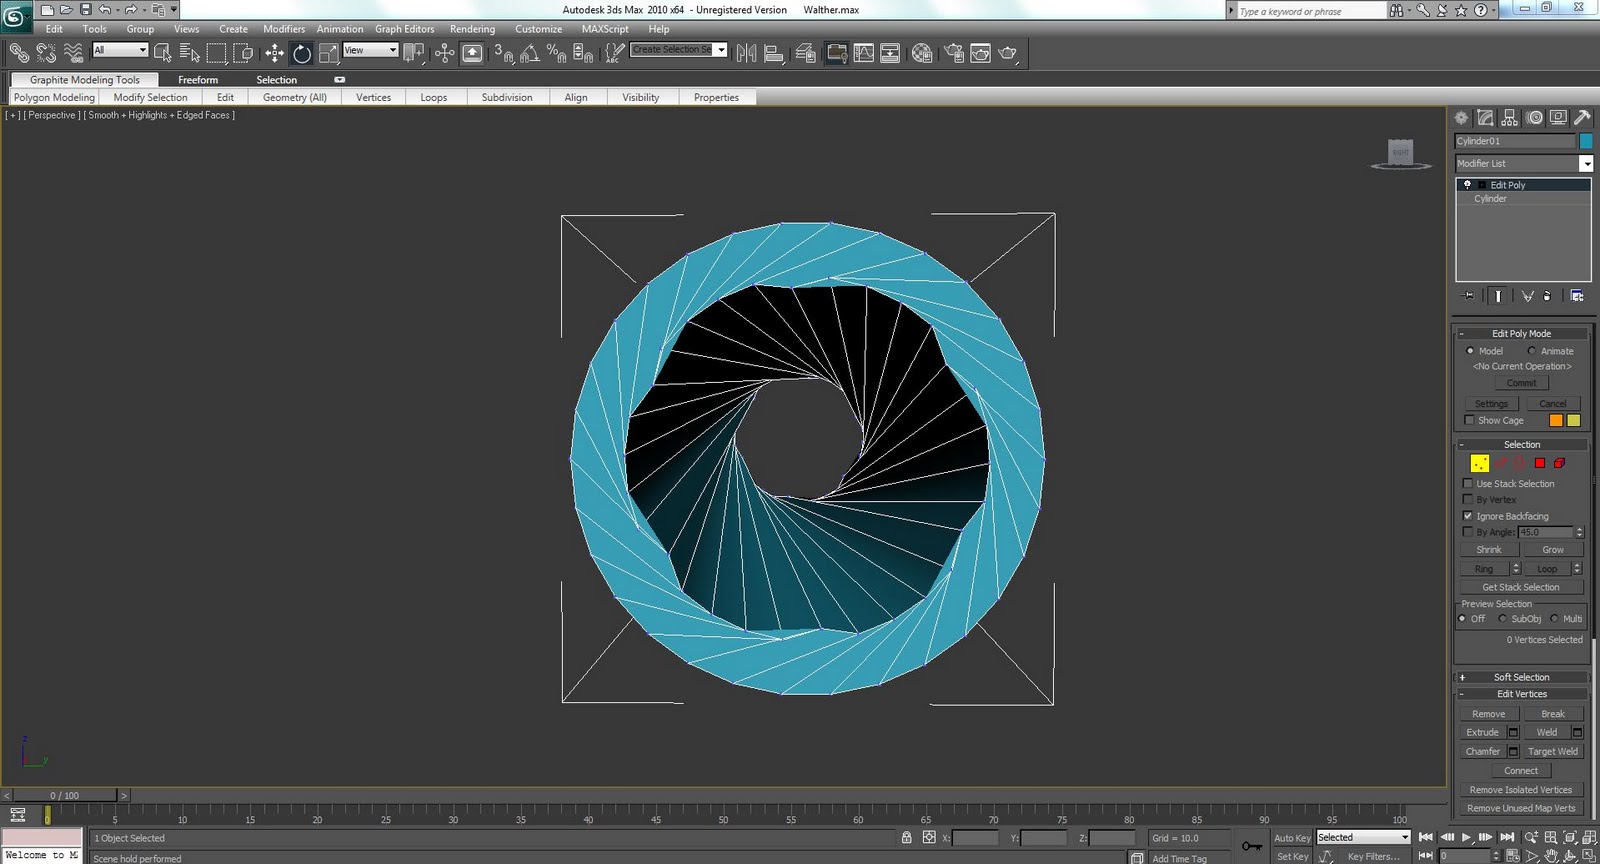
Perspective view of the rifling.