Monday, 31 January 2011

Research board for Casino Royal


I have decided to make a trailer for the film Casino Royal, as it is my favourite modern Bond film, which is full of well shot action scenes. I would like to try and recreate part of the initial Parkour fight scene, when Bond is chasing Sebastien Foucan over the building site. I would also like to recreate the Aston Martin DBS car crash as I think creating a car with 3ds max could be quite a rewarding challenge.

I think that creating one of the poker scenes could be interesting; I could animate a pack of cards being shuffled or a poker chip spinning.

Friday, 28 January 2011

Creating Fruit

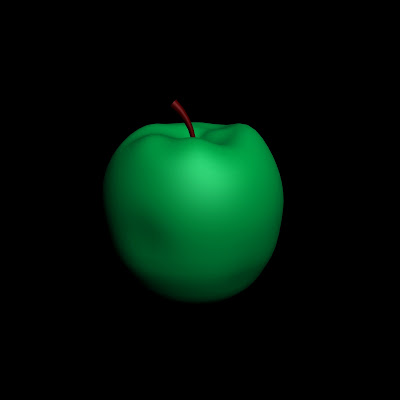
This is my attempt at creating an apple.

After creating a sphere and converting it into an editable poly I used the vertex selection tool with soft selection. This allows one to manipulate the segments that make up the sphere in a softer, more natural, way.


I used the polygon selection tool to select and pull some of the bottom segments down to create a more apple-like shape.


For the bottom of the apple I firstly selected the central vertex and pulled it up to create the dimple. Using the soft selection I could then pull up the y axis of the selection to create the indents at the bottom. I had to change the “fall off” of the soft selection so that the selection group was smaller.


To make the stalk of the apple I created a cylinder. I then applied a squeeze modifier to make the top of the cylinder slightly larger. I then applied a bend modifier to curve the stalk.


To make the apple look more realistic I have used the soft selection tool to put a few subtle dents on it. I then applied a turbo smooth modifier to smooth the apple's surface.


This is the final render of the apple

Creating first model in 3ds Max

This was my first attempt at the Whitehouse tutorial.

To position the roof (which was constructed out of a three sided cylinder)centrally onto the main body of the house, the align selection was used. By selecting the X axis and centre button on the current and target object, the roof could be centralised. This could then be repeated for the Y and Z axes accordingly.


The clone option was used to clone the upright columns at the front of the model. As I wanted each column to be identical, the instance option was selected. This way, any change or modifier applied to a column would affect all of them. The number of copies was set to three.


The squeeze modifier was used to create the tapering effect of the upright columns.


To create the indents for the windows, I increased the number of width and height segments of the box that made up the house. I then converted the box to an editable poly and selected each square where I wanted the window. I then used extrude to indent the windows.


This is the finished render of the White House.

Tuesday, 25 January 2011

Reaction to the brief

The brief seems like it could be quite challenging. Thirty seconds is a very short space of time and I think it will be quite hard to condense the chosen film into this time frame. I will probably end up producing three or four times the amount of animation and then spending a long time editing it down to size.